3.8.3. Speed cameras
Information about speed camera items includes the following components:
- The intersection where the camera is located.
- Types of recorded violations.
- Camera directions.
- Road section at which the camera is directed.
That's why the camera can only be drawn after the road sections that it affects have been completely drawn in.
3.8.3.1. Speed cameras: rules for mapping
3.8.3.1.1
-
The types of fixed speed cameras indicated above (and their dummy equivalents) should be assigned the
Camera
in theRoad infrastructure
category in YME.Other types of cameras:
- Mobile speed cameras
- Cameras intended for other uses (for example, web cameras that monitor intersections, etc.)
- Automated mobile systems (cameras mounted on tripods)
— should not be drawn (these items will be deleted from the map).
3.8.3.1.2
-
Each camera item in Yandex Map Editor corresponds to one or more directions of filming and one or more types of traffic violations.
A monitored road section is a section monitored by the camera.
You can enter as many cameras as are required for each intersection:
- Draw cameras that are mounted on a single support but monitor different types of violations (one front-facing and one rear-facing) as different cameras.
- Draw paired cameras that measure average speed as separate speed cameras.
If a camera monitors several types of violations, create a single camera item at the road point and use boxes to set the types of monitored violations. You can still create a separate camera item for each violation type, but it's preferable to create a single camera that has all the types of monitored violations set.
If a camera monitors the same set of violations for both the front-facing and rear-facing directions, it is preferable to create a single camera item at the road point. However, you can still create a separate camera item for each direction.
So, it is recommended to create a single camera if it monitors two different types of violations in both directions. However, you can still create four cameras (one for each direction and each type of violation).
3.8.3.2. Speed camera: add
To draw a camera:
-
There are two ways to draw a camera: in the Camera panel or the Intersection panel (if the camera is installed at an intersection). In the first case, the road intersection will be created automatically; in the second — an intersection that was created earlier will be used:
-
Click the button
 .
.In the map item category menu, select Road infrastructure → Camera.
The Camera panel will open.
-
Click the intersection the camera should be set on to select it on the map.
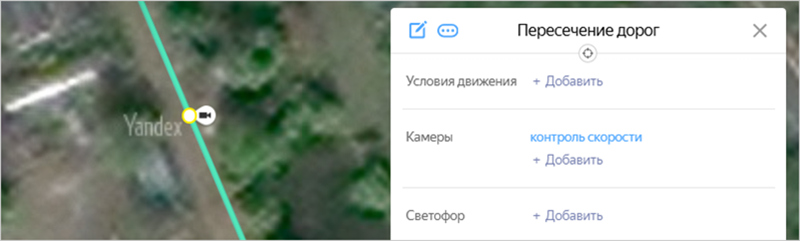
In the Road intersection panel that opens, click Add near
Cameras
: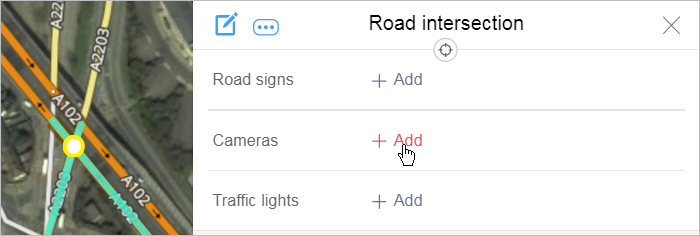
The Camera panel will open.
-
-
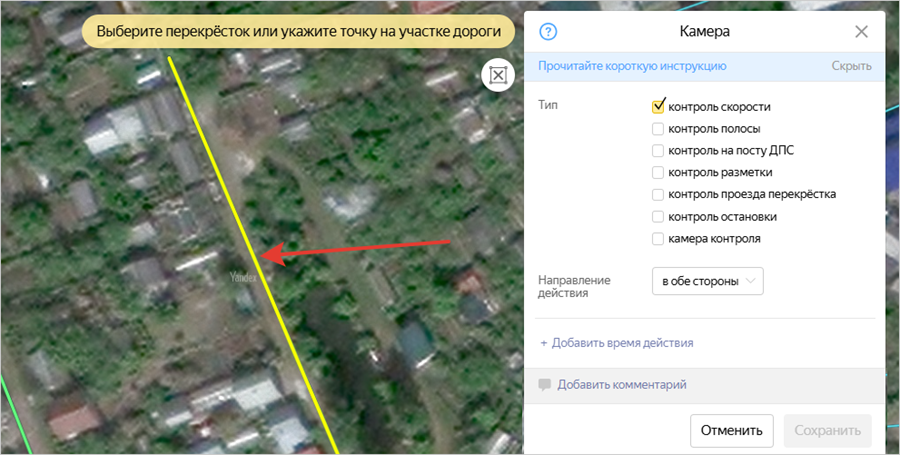
Click to select the place where you want to place the camera on the map:
If an intersection was not created earlier at the place where the camera should be, then this intersection will be created automatically.
-
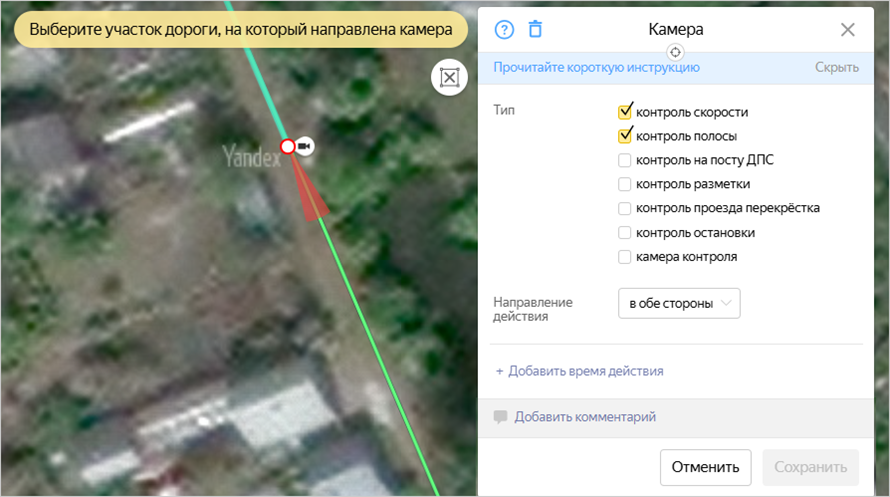
In the Typefield, tick the boxes next to the types of violations to monitor:
- Speed camera — monitors speed limit violations.
- Lane monitoring camera — monitors vehicles entering public transport lanes, reverse traffic lanes, and roadsides.
- Traffic police checkpoint — monitoring near TPCs. This item type isn't currently mapped.
- Monitoring lanes — monitors drivers who make turns from the wrong lane or cross solid lane markings.
- Intersection monitoring — monitors red light,
waffle marking
, and stop line violations; also includes cameras that monitor pedestrian crossings and tram stop marking violations. - Monitoring stopping — monitors drivers that stop in areas where stopping is restricted.
- Speed camera type is only mapped on the Arabian Peninsula and is only available to employees.
In the Direction field, select the direction of violation monitoring:
- Front-facing: Monitors oncoming vehicles (this direction is also used if you don't know in which direction the camera works).
- Rear-facing: Monitors vehicles driving away.
- Both directions: Monitors both oncoming vehicles and vehicles driving away (this value is used only on single-lane roads with two-way traffic when there's front-facing and rear-facing monitoring for the same monitored section).
- Not set: Similar to the "front-facing" direction. As for now, we need this option for the previously created cameras to display correctly on the map. Over time, this value will be removed.
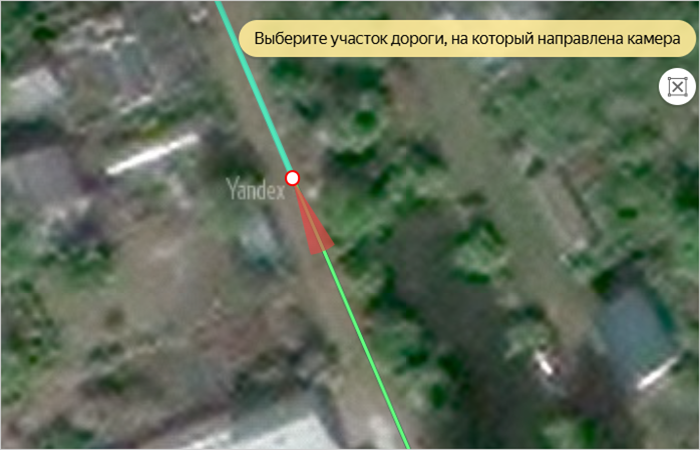
On the map, click the road section monitored by the camera:

The Redraw
 button will appear on the panel.
When you click on it, the data you entered will be deleted and you can add the camera again.
Note
If you need to move the camera you're redrawing to a point where there is no intersection, then you need to create an intersection at that point ahead of time.
If you need to move the camera you're redrawing to a point where there is already an intersection, then you don't need to prepare it ahead of time.
The section you select will be indicated on the map with a drawing:
Alert
For speed cameras, the speed limit value is determined automatically based on the speed limit for passenger cars that is specified in the attributes of the road section targeted by the camera.
When working with a speed camera, make sure to enter a Speed limit attribute value for the road section that it monitors.
-
If the camera you added has a time restriction (i.e. it isn't in effect 24-hours a day), then enter this information.
To do this:
-
In the attribute panel that opens, click Camera and then Add time limit.
-
Enter the values for the restrictions in the fields that open:
-
Time: time when camera starts and stops running.
Enter time using four digits in the HH:MM format. For example, enter 8:00 am as 08:00, and 8:30 pm — as 23:30.
If the values of the fields are not entered, then the condition will always apply.
-
During period: The date when the camera starts and stops running.
Enter dates using four digits in the DD.MM format. For example, write April 1 as 01.04, and November 23 — as 23.11.
If the values of the fields are not entered, then the condition will always apply.
-
Weekdays, days of the week, and weekends — check the appropriate boxes.
All boxes are checked by default. If monitoring is not in effect on all days of the week, then the desired options should be removed. For example, if a camera only records on weekdays, then uncheck the
Weekends
boxes.
If the camera's operation involves a few different time restrictions (for example, for weekdays and weekends or for different calendar periods), then click twice on Add time limit to open a second field where you can enter time restrictions along with the appropriate values.
To delete an extra time restriction entry field, just click
 (Delete).
 -
-
-
Click Save in the attribute panel of the map item. Information about cameras at intersections will be saved:
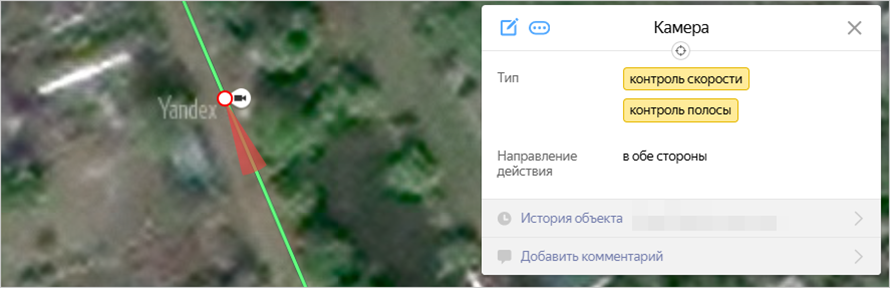
Several cameras can be linked to one crossing.
3.8.3.3. Speed cameras: editing, deleting, undoing edits, and sending reports to the moderator
To edit a camera:
-
Click to select the intersection on the map:
-
In the Road intersection attribute panel that opens, click the link in the Cameras section:
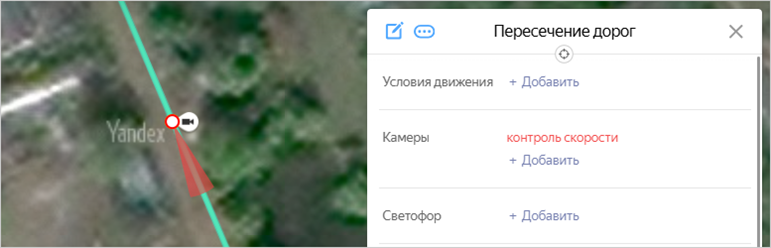
-
To edit an item, click Edit
 in the Camera panel that opens.
If necessary, change the types of violations and directions to monitor. You can also adjust the camera position:
The Redraw
button will appear on the panel.When you click on it, the data you entered will be deleted and you can add the camera again.
Note
If you need to move the camera you're redrawing to a point where there is no intersection, then you need to create an intersection at that point ahead of time.
If you need to move the camera you're redrawing to a point where there is already an intersection, then you don't need to prepare it ahead of time.
-
Click Save
 in the attribute panel
 -
Undo edits returns an item to the condition it was in
before you started editing it
(all the way back to the condition it was in when it was last approved by a moderator). If the item was created recently and still hasn't been approved by the moderator, then undoing edits will result in the item being deleted.Only moderators have access to the Delete operation that lets them delete an item. YME users can delete items they created in error by undoing their own edits until the item disappears (if the item was just created and it was not approved by a moderator yet). If an item that was created earlier and already approved by a moderator needs to be deleted, you should report it to the moderator.
The procedure for undoing edits is described in 2.10.6. Item: undoing edits, error messages, removing items, linking to items.
-
If an item was already approved by the moderator, then undoing edits will return the item to the condition it was in when it was approved. In this case users cannot delete an item by themselves and will need to report the item to the moderator for it to be deleted. You can send error reports to the moderator regarding a number of issues, not just when you need to remove an item.
The procedure for sending reports is described in Section 2.10.6. Item: undoing edits, error messages, removing items, linking to items.