2.7.4.2. Composite polygonal items: editing techniques
- 2.7.4.2.1. Editing a polygon without changing its contents
- 2.7.4.2.2. Delete a vertex
- 2.7.4.2.3. Add vertexes
- 2.7.4.2.4. Make angle 90°.
- 2.7.4.2.5. Round all corners
- 2.7.4.2.6. Edit internal polygon
- 2.7.4.2.7. Editing items consisting of multiple polygons
- 2.7.4.2.8. Merging items with deleting the borders
- 2.7.4.2.9. Split a polygon into parts
2.7.4.2.1. Editing a polygon without changing its contents
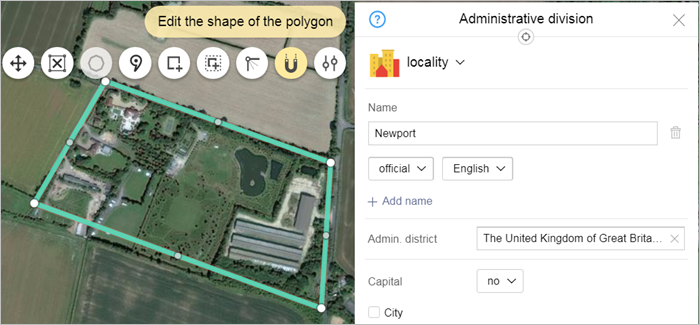
To edit the shape of a polygon (without changing its contents):
-
Select the item on the map. The attribute panel for the map item opens (for example,
Administrative division
). -
In the attribute panel that opens, click Edit
 .
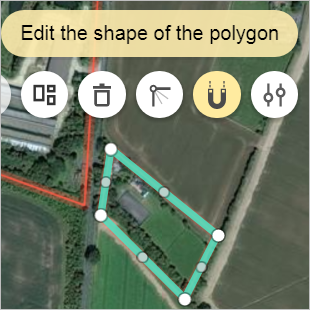
.The item and attribute panel will switch to editing mode:
Additionally, you will see a local toolbar that contains buttons (active buttons are orange, inactive buttons are white):
 — Indicate or change center of item. The button is only present for
 Administrative unit
categories of items (See section 3.2.3. Drawing centers of administrative divisions) andVegetation item
(see 3.9.3. Drawing centers of vegetation items). — Add external polygon. Launch the add external polygon mode (for the item you are editing).
 — Add an internal polygon. Launch the add internal polygon mode (for the item you are editing).
 — Snap to other map items mode. This button snaps the vertexes of the new item to neighboring polygons that were drawn earlier. This mode is used if, for example, you are drawing administrative divisions that have shared borders.
 — Polygon selection mode. This button is only available for items that consist of several polygons. It lets you switch between them and highlight the one you need. See 2.7.4.2.7. Editing items consisting of several polygons.
 — Advanced mode. Starts the advanced polygon editing mode in which you can edit the shape of an existing polygonal item and create new polygons as part of the item that is being edited.
2.7.4.2.2. Delete a vertex
You can delete a vertex that you positioned incorrectly. After you delete the vertex, you can continue editing the polygon.
To delete a vertex:
-
Select the item on the map. The attribute panel for the map item opens (for example,
Administrative division
). -
In the attribute panel that opens, click Edit
.The item and attribute panel will switch to editing mode:
-
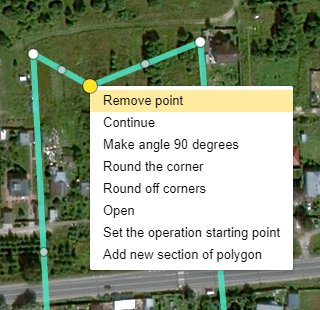
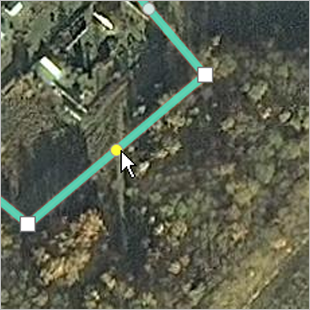
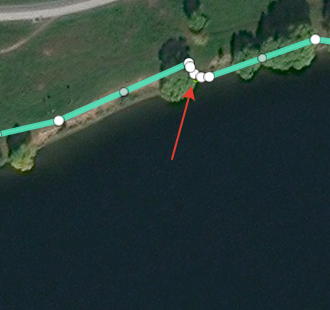
Click on the appropriate vertex to open the context menu. Then click Delete. The vertex you selected will be deleted. In its place will be a straight line connecting the vertexes that neighbor the one you deleted:
-
Click Save. Your changes will be saved.
2.7.4.2.3. Add vertexes
You can add a vertex to correct your drawing of an item. After you add vertexes, you can continue editing the polygon.
To add vertexes:
-
Select the item on the map. The attribute panel for the map item opens (for example,
Administrative division
). -
In the attribute panel that opens, click Edit
.The item and attribute panel will switch to editing mode:
-
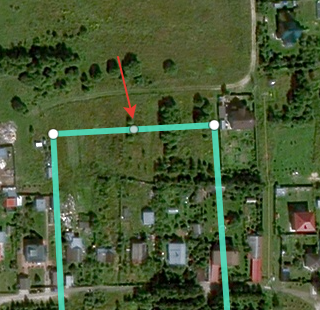
Drag the point in the middle of two vertexes to the appropriate place. Release the mouse button to place the new vertex in the position you selected:
-
Click Save. Your changes will be saved.
2.7.4.2.4. Make angle 90°.
You can make an angle 90° if you did not manage to draw a perfect right angle yourself. After you make the angles right, you can continue editing the polygon.
To make an angle 90°:
-
Select the item on the map. The attribute panel for the map item opens (for example,
Administrative division
). -
In the attribute panel that opens, click Edit
.The item and attribute panel will switch to editing mode:
-
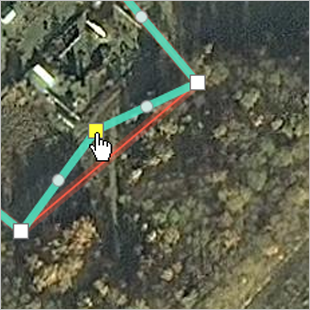
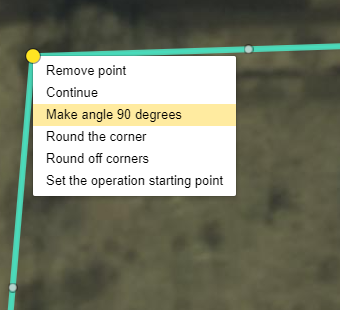
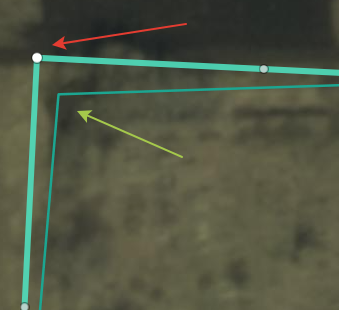
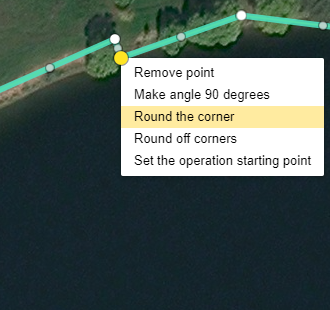
Select the appropriate vertex to open the context menu and then click Make angle 90°. The point you selected will become a right angle:
-
Click Save. Your changes will be saved.
2.7.4.2.5. Round all corners
The general rules for drawing curved sections of items state that corners should be rounded. After you round your item's corners, you can continue editing it.
To round a corner (or all corners):
-
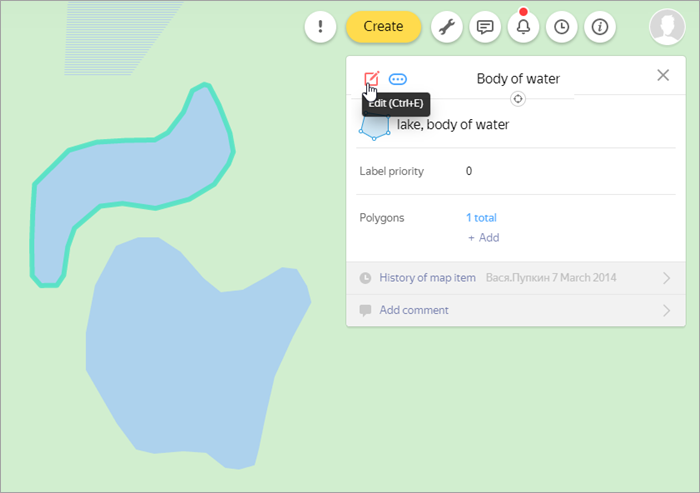
Select the item on the map. The attribute panel for the map item opens (for example,
Reservoir
). -
In the attribute panel that opens, click Edit
.The item and attribute panel will switch to editing mode:
-
To round one corner: select the appropriate vertex to open the context menu and then click Round the corner. The selected angle will be rounded:
-
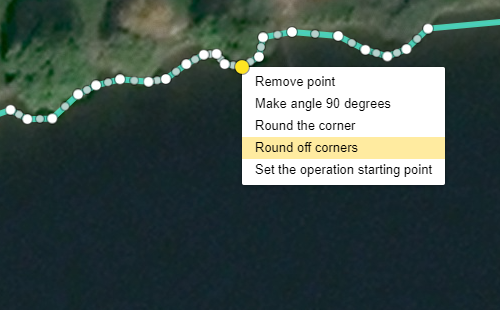
To round all corners: click on any vertex to open the context menu. Then click Round all corners All angles of the polygon will be rounded:
-
Click Save. Your changes will be saved.
2.7.4.2.6. Edit internal polygon
Alert
When drawing internal polygons, follow 2.7.2. Rules for using internal polygons.
To edit the shape of an internal polygon:
-
Select the item on the map. The attribute panel for the map item opens (for example,
Woodlands
). -
In the attribute panel that opens, click Edit
.A local toolbar will open:
Click
(Polygon selection mode) in the local toolbar.Select the (internal) polygonal item. The item and attribute panel will switch to editing mode.

The local toolbar contains buttons (active buttons are orange, inactive buttons are white):
 — Drag-and-drop mode. You can drag the polygon to a new position without changing its shape. When you drag the polygon, make sure not to disrupt the relative positioning of the internal and external polygons: the internal polygon can't intersect with the borders of the external one.
 — Redraw. Deletes the internal polygon (but leaves its outline visible) and lets you re-draw it.
— Polygon selection mode. This button is only available for items that consist of several polygons. It lets you switch between them and highlight the one you need (see Section 2.7.4.2.7. Editing items consisting of several polygons).
— Snap to other map items mode. This button snaps the vertexes of the new item to neighboring polygons that were drawn earlier. This mode is used if, for example, you are drawing administrative divisions that have shared borders.
— Advanced mode. Starts the advanced polygon editing mode in which you can edit the shape of an existing polygonal item and create new polygons as part of the item that is being edited.
— Redraw. Deletes the internal polygon (but leaves its outline visible) and lets you re-draw it.
— Polygon selection mode. This button is only available for items that consist of several polygons. It lets you switch between them and highlight the one you need (see Section 2.7.4.2.7. Editing items consisting of several polygons).
— Snap to other map items mode. This button snaps the vertexes of the new item to neighboring polygons that were drawn earlier. This mode is used if, for example, you are drawing administrative divisions that have shared borders.
— Advanced mode. Starts the advanced polygon editing mode in which you can edit the shape of an existing polygonal item and create new polygons as part of the item that is being edited. -
Edit a polygon:
- Edit the shape of the selected polygon similarly to how you edit the shapes of other polygons. See 2.7.4.2.1. Editing a polygon without changing its composition.
- Delete the selected polygon by clicking Delete polygon
 .
. - Drag the selected polygon by clicking Drag.
- Redraw the selected polygon by clicking Redraw.
-
Click Save. Your changes will be saved.
2.7.4.2.7. Editing items consisting of multiple polygons
When you edit items consisting of several polygons:
-
Before your item will switch to
(Editing mode) after you click , you will be asked to Select a polygon to edit
. This will also activate the button (Polygon selection mode) in the local toolbar: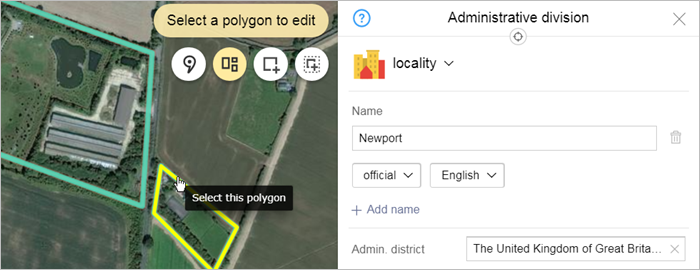
In this case, you must click the appropriate polygon and it will open in editing mode:
-
"Editing" primarily refers to the alteration of the item's shape. The techniques used in this case are identical to the techniques described in Section 2.7.4.2.1. Editing a polygon without changing its composition.
-
When you click
 (Delete), the selected polygon will be deleted.
You should keep in mind that at least one polygon should remain after you delete a polygon from a map item. If you delete the last polygon of an item, you will also delete the item itself (for more information on deleting items, see 2.10.6. Item: undoing edits, error messages, removing items, linking to items).
-
To switch to editing mode (where you can, for example, add a new polygon to an item), click Advanced mode
on the local toolbar. The following buttons will be added to the toolbar: — Add/exclude existing sections mode. When this mode is active, clicking on sections of the border will either add them to the map item or exclude them from it.
 — Draw new polygon sections mode.
Alert
When drawing internal polygons, follow 2.7.2. Rules for using internal polygons.
2.7.4.2.8. Merging items with deleting the borders
In some cases you may need to join (merge) two or more polygons into one and delete the borders between them.
To do this:
-
Select one of the two polygons. In the attribute panel, click Edit
.
-
In the local toolbar that opens, click Advanced mode
and draw the missing polygon sections. To finish drawing a polygon section, click any of its vertices (circle marks) and choose Add new section of polygon or Complete from the context menu: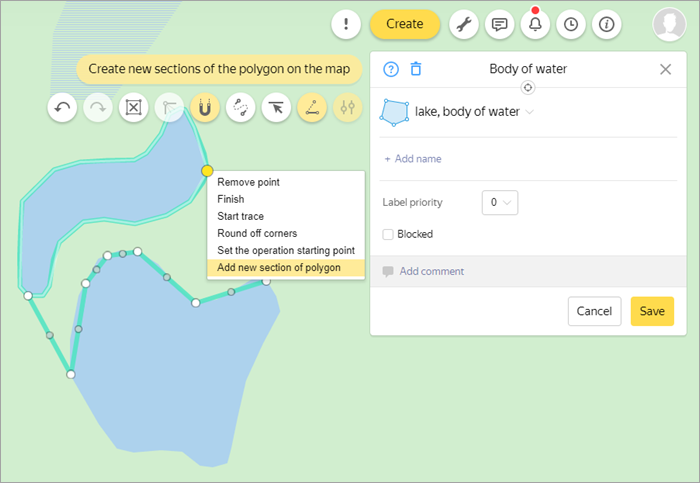
-
In the local toolbar, click Add/exclude existing sections mode
. Draw the item border by adding or excluding polygon sections. Click Save: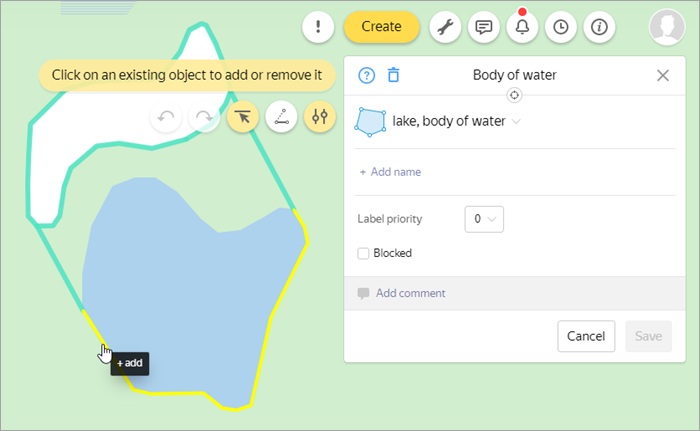
-
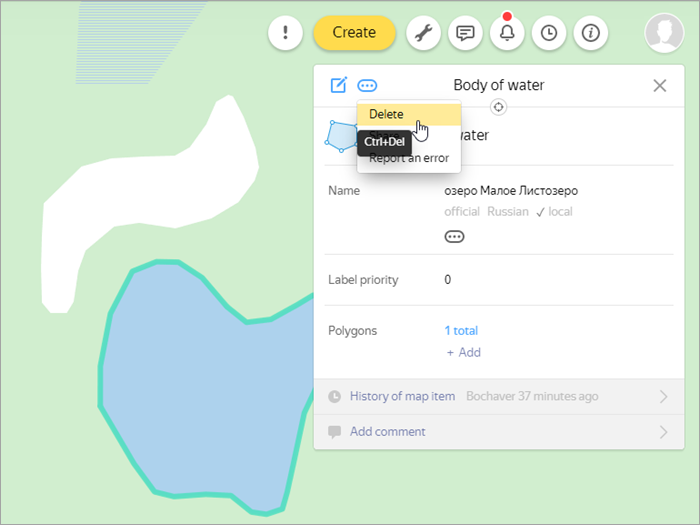
Select the polygons you don't need (the internal ones) and request deleting them using the menu in the attribute panel:
2.7.4.2.9. Split a polygon into parts
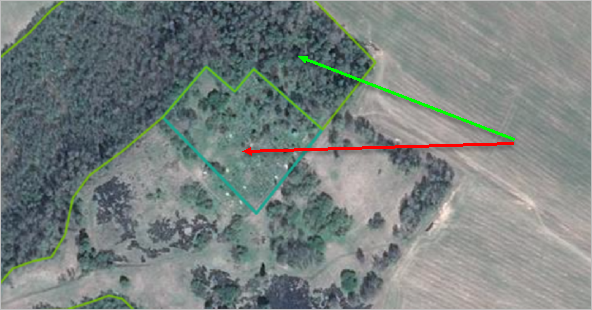
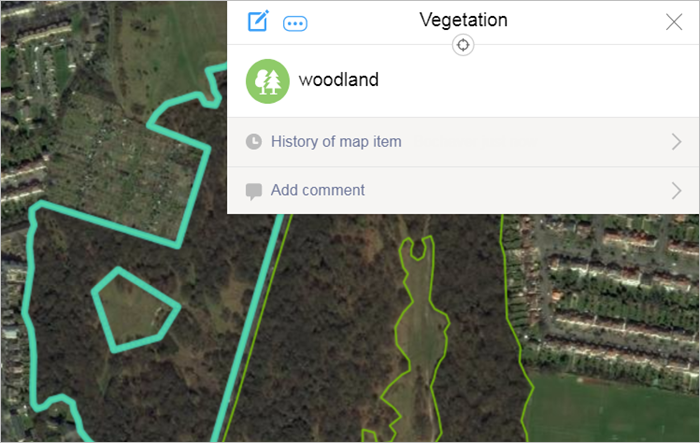
There are several reasons why you may need to split a polygon into parts. For example, you may need to select different types of vegetation polygons. After you divide the polygon, you can continue editing.
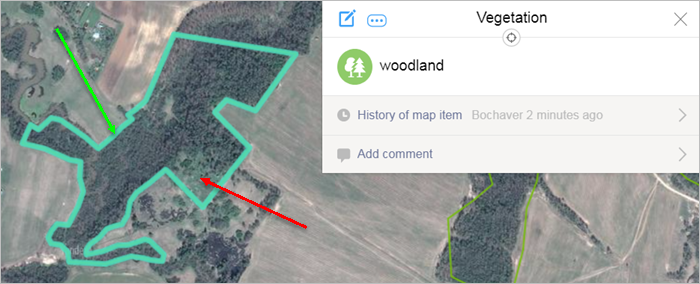
For example, let's say that you need to distinguish a cemetery (red arrow) from the woodlands surrounding it (green arrow):
To divide a polygon into parts:
-
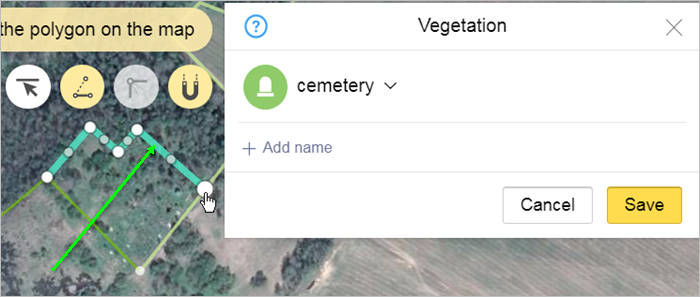
Click Create and select the appropriate item type (
Cemetery
).Create a new section of border in the spot where the existing polygon should be divided:
-
Click
(Add/exclude existing sections mode).Add the sections of border that should form part of the new polygon (i.e. the cemetery) to the new section of border:
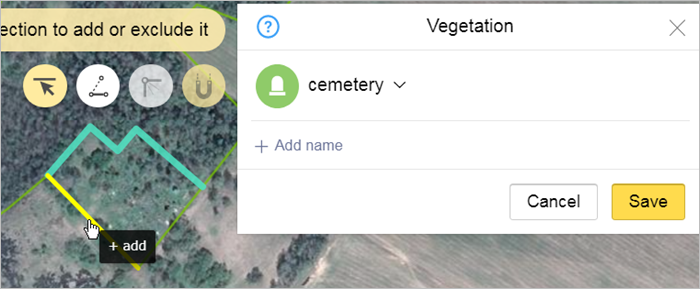
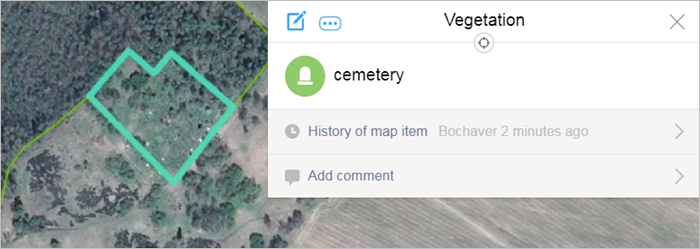
-
Save the new item:
-
Select the old polygon (woodlands) on the map. Tap Change
. The item will switch to editing mode. -
Click Advanced mode
.The polygon will switch to advanced editing mode.
-
Click Add/exclude existing sections mode
.Exclude the sections of border that are transferring to the new polygon (the cemetery):
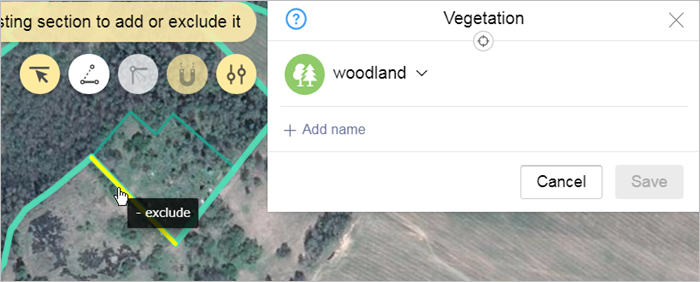
-
Add the new section of border (the one that separates the new polygon from the old one) to the old item:

-
Save the old polygon (woodlands) with its new borders:
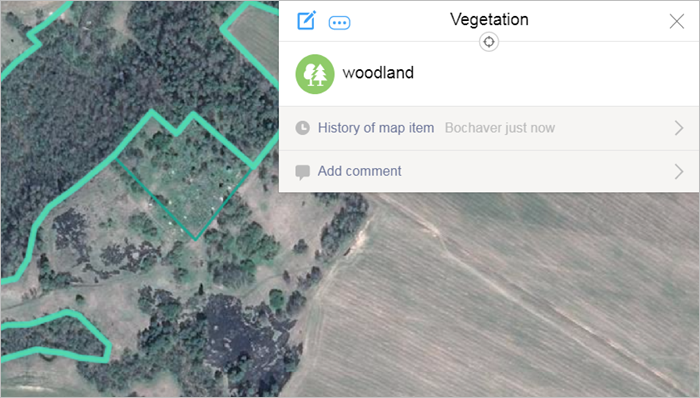
This way you will have two adjacent vegetation items: woodlands (green arrow) and cemetery (red arrow):