Step 1. Create a trust relationship with the relying party
Log in to your AD FS server and open Server Manager.
Open the management console by clicking Tools → AD FS Management.
In the list of actions, select Add Relying Party Trust.
Select Claims aware and click Start.
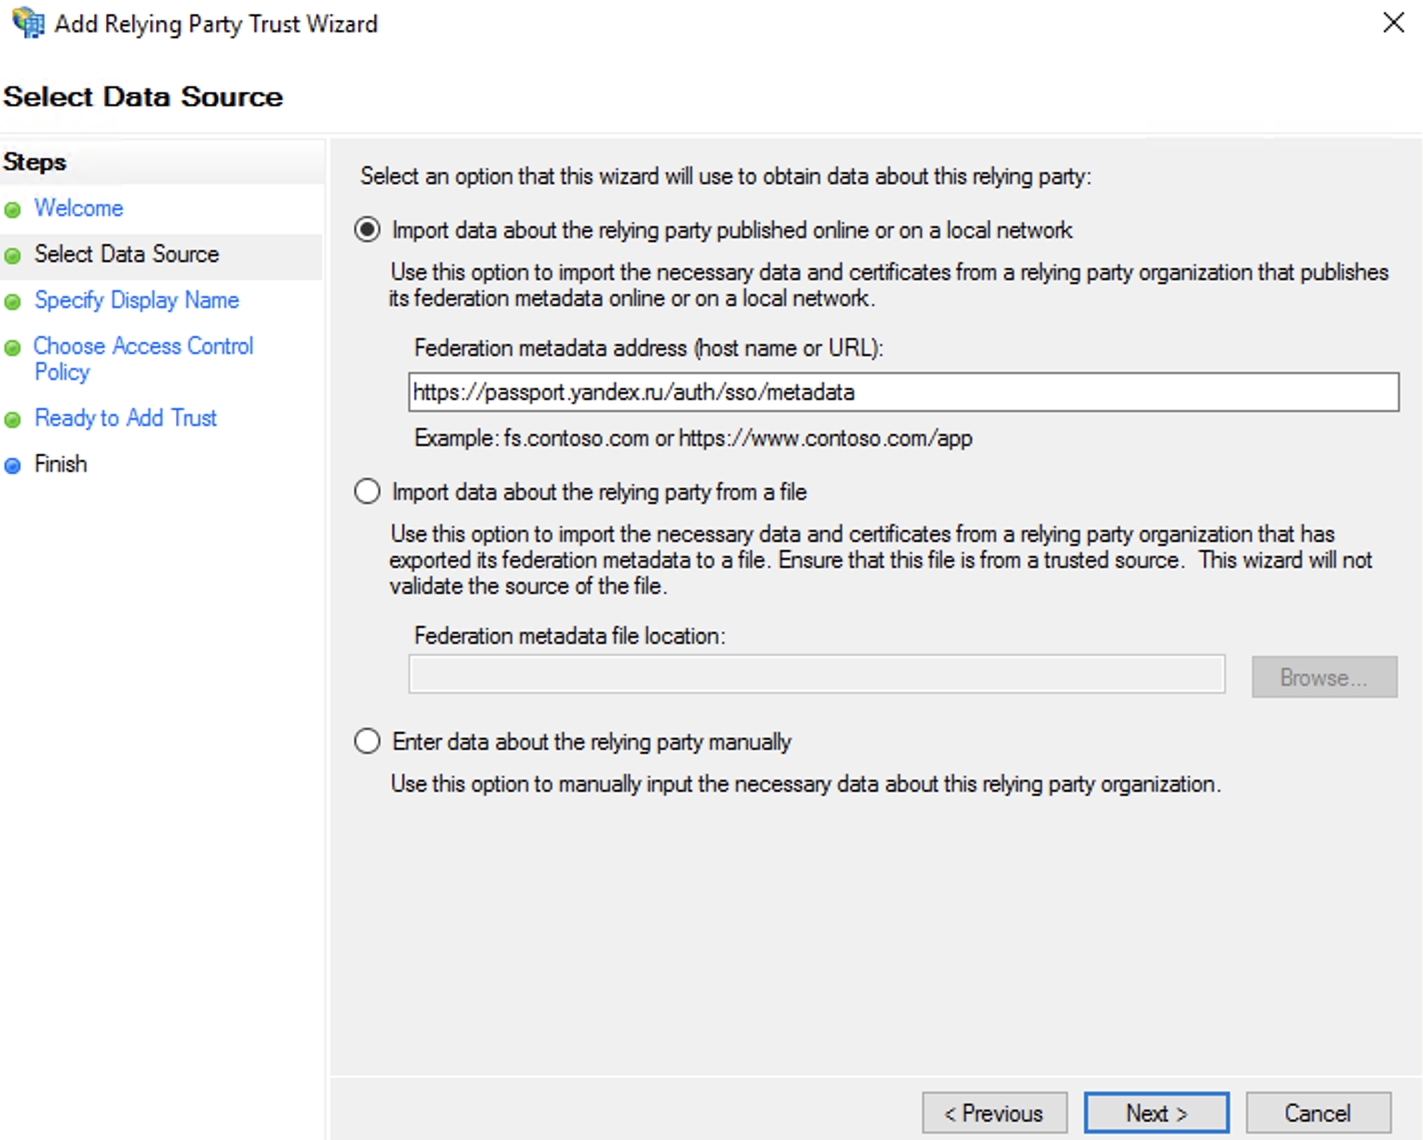
To set up the relationship automatically, select Import data about the relying party published online or on a local networkunder Select Data Source and enter the following URL: https://passport.yandex.ru/auth/sso/metadata.
Click Next.
How to set up the relationship manually
Under Select Data Source, select Enter data about the relying party manually. Then click Next.
Specify any relationship name, for example, “Yandex 360”. Click Next.
Skip the Configure Certificate step by clicking Next.
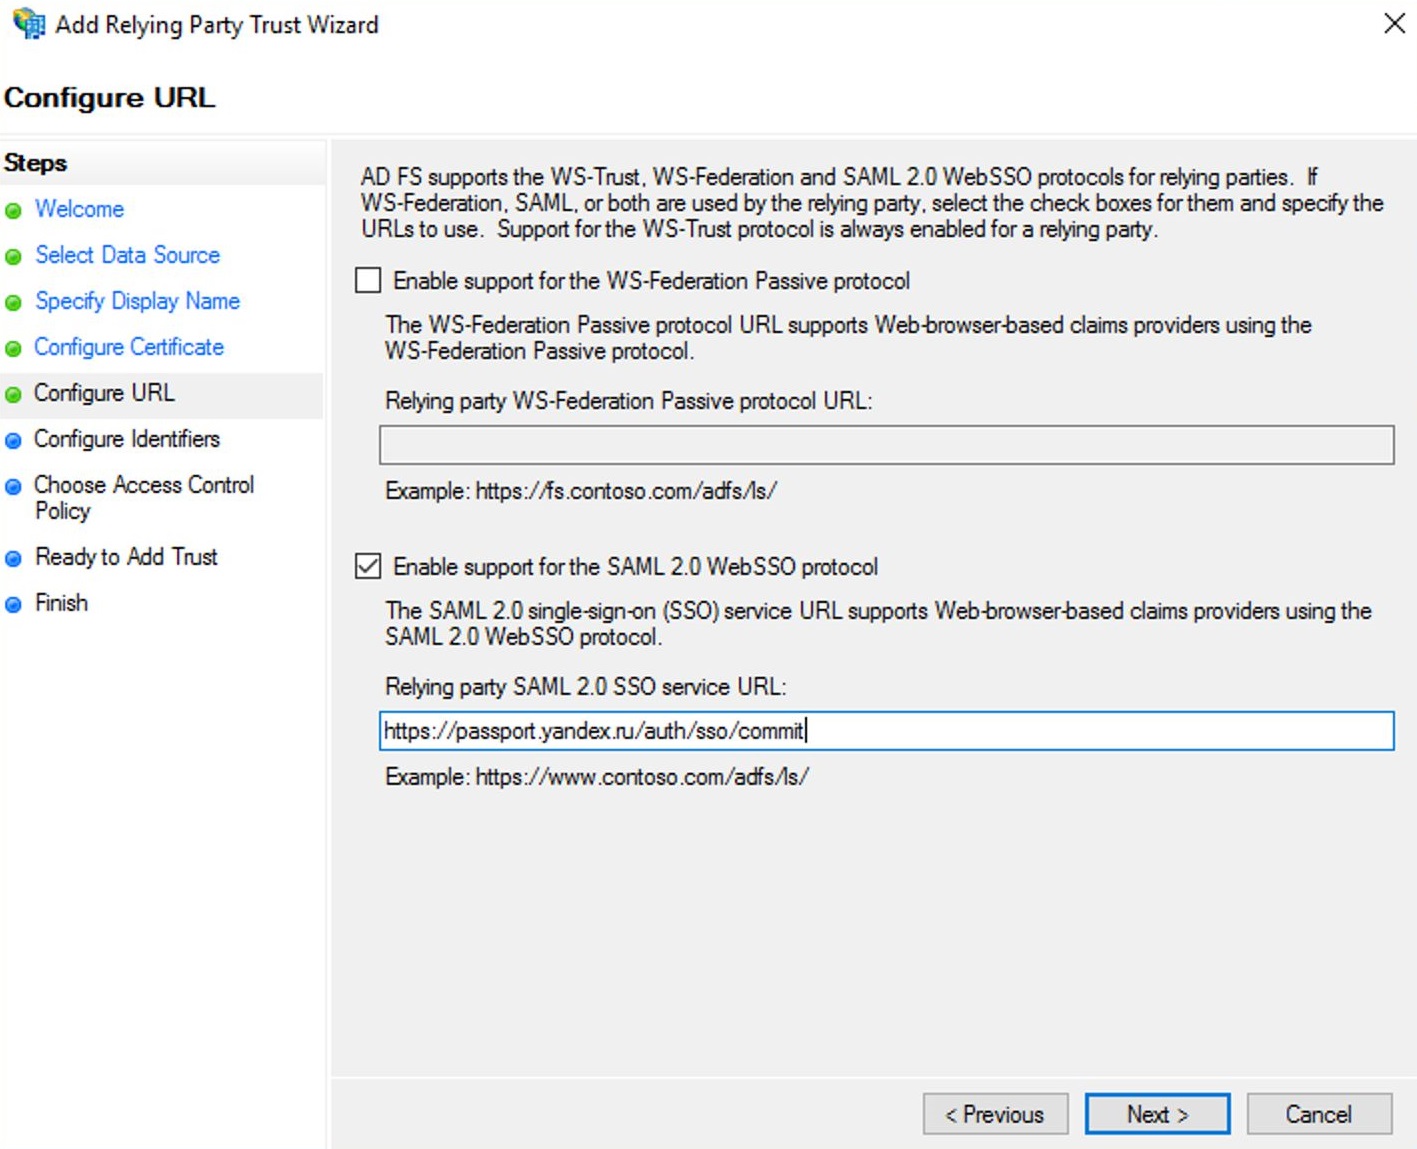
Select Enable support for the SAML 2.0 WebSSO protocol and specify the Service URL: https://passport.yandex.ru/auth/sso/commit. Click Next.
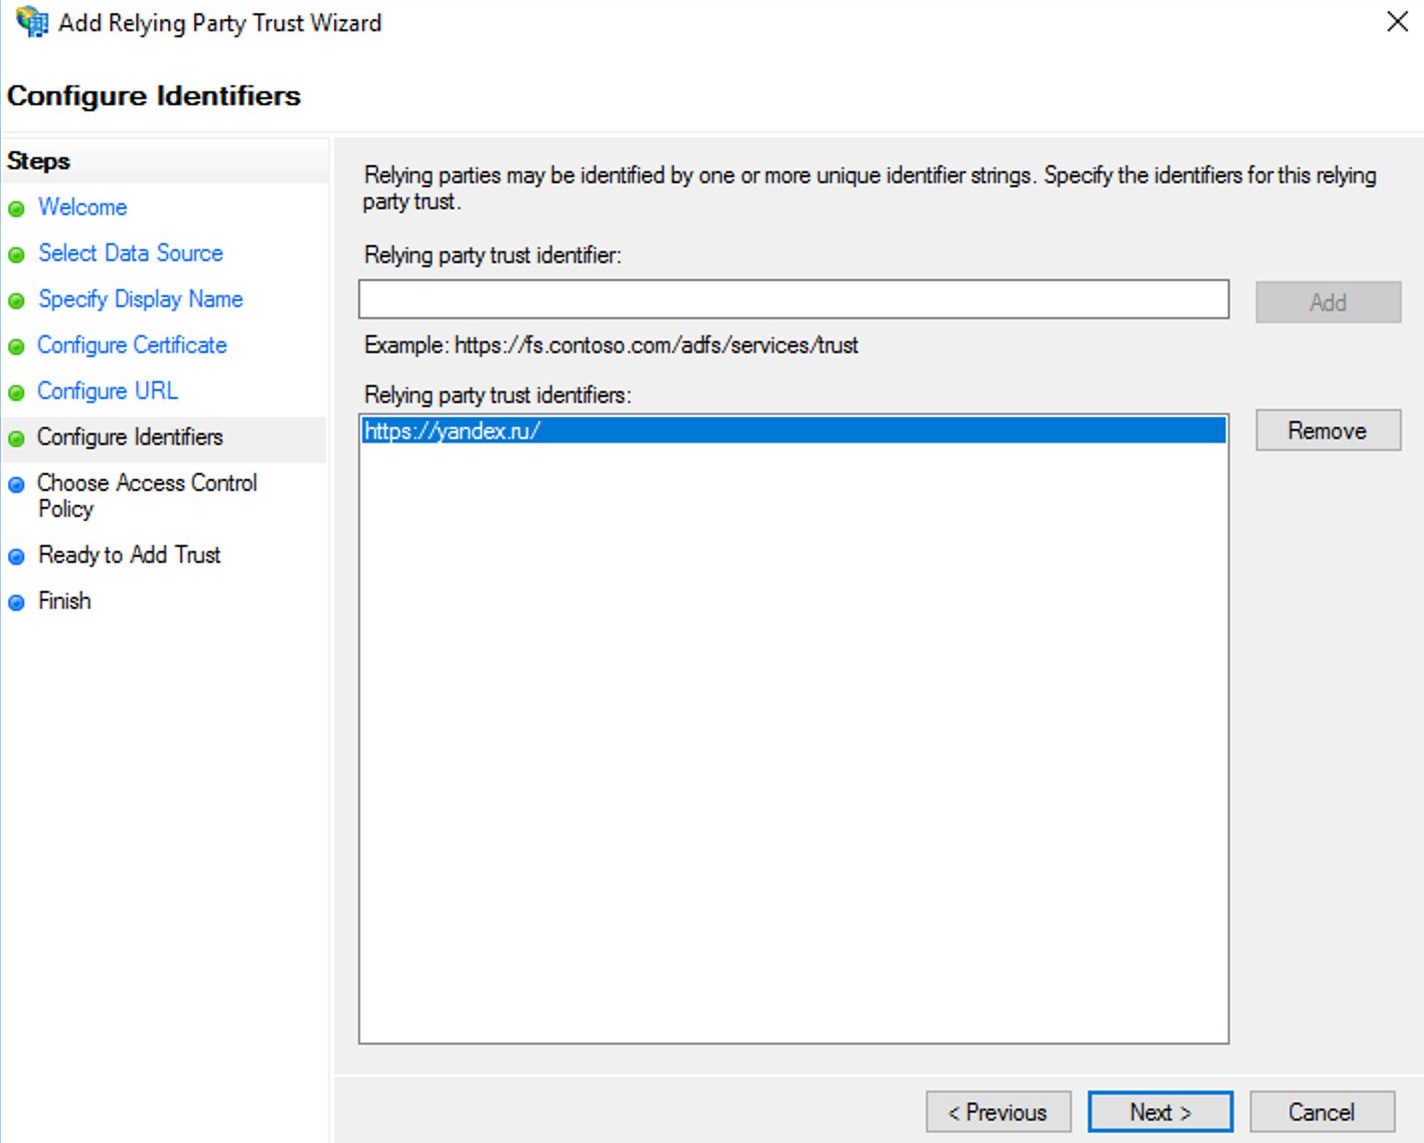
Add the identifier https://yandex.ru/ (with a slash at the end) by pasting it into the field and clicking Add. Then click Next.
Skip Choose Access Control Policy.
Check the data. Make sure the SHA-256 hash algorithm is selected on the Advanced tab. If everything is in order, click Next → Close.
If you used automatic setup, go straight to Step 3. If you set up the relationship manually, follow Step 2.
Step 2. Add endpoints for language-specific domains
Attention. Skip this step if you used automatic setup in Step 1.
If your employees use Yandex 360 services not only on the Russian domain, add the URLs with language-specific domains as endpoints:
In the management console, click Trust Relationships → Relying Party Trusts.
Open the settings of the relationship created in Step 1 by double-clicking it.
Go to the Endpoints tab.
Add endpoints.
To add an endpoint for a language-specific domain, click Add SAML, select POST under Binding, and specify the URL:
In the Trust Relationships block, right-click on the relationship created in Step 1 and select Edit Claim Issuance Policy.
Click Add Rule.
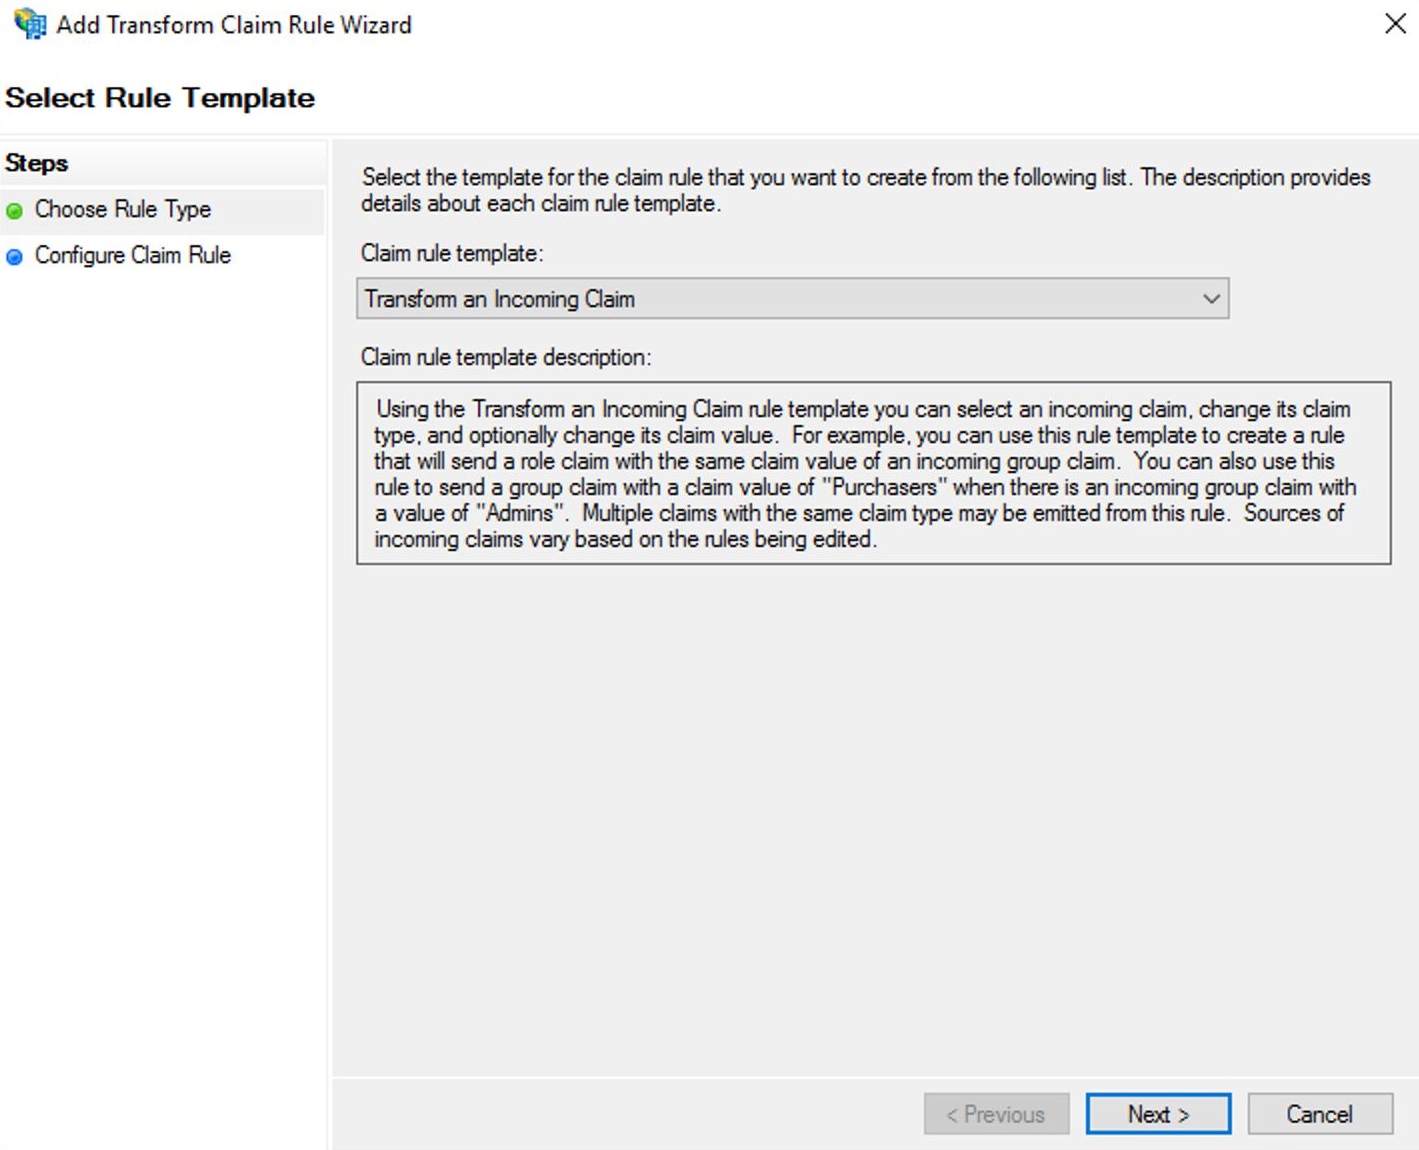
Under Claim rule template, select Transform an Incoming Claim and click Next.
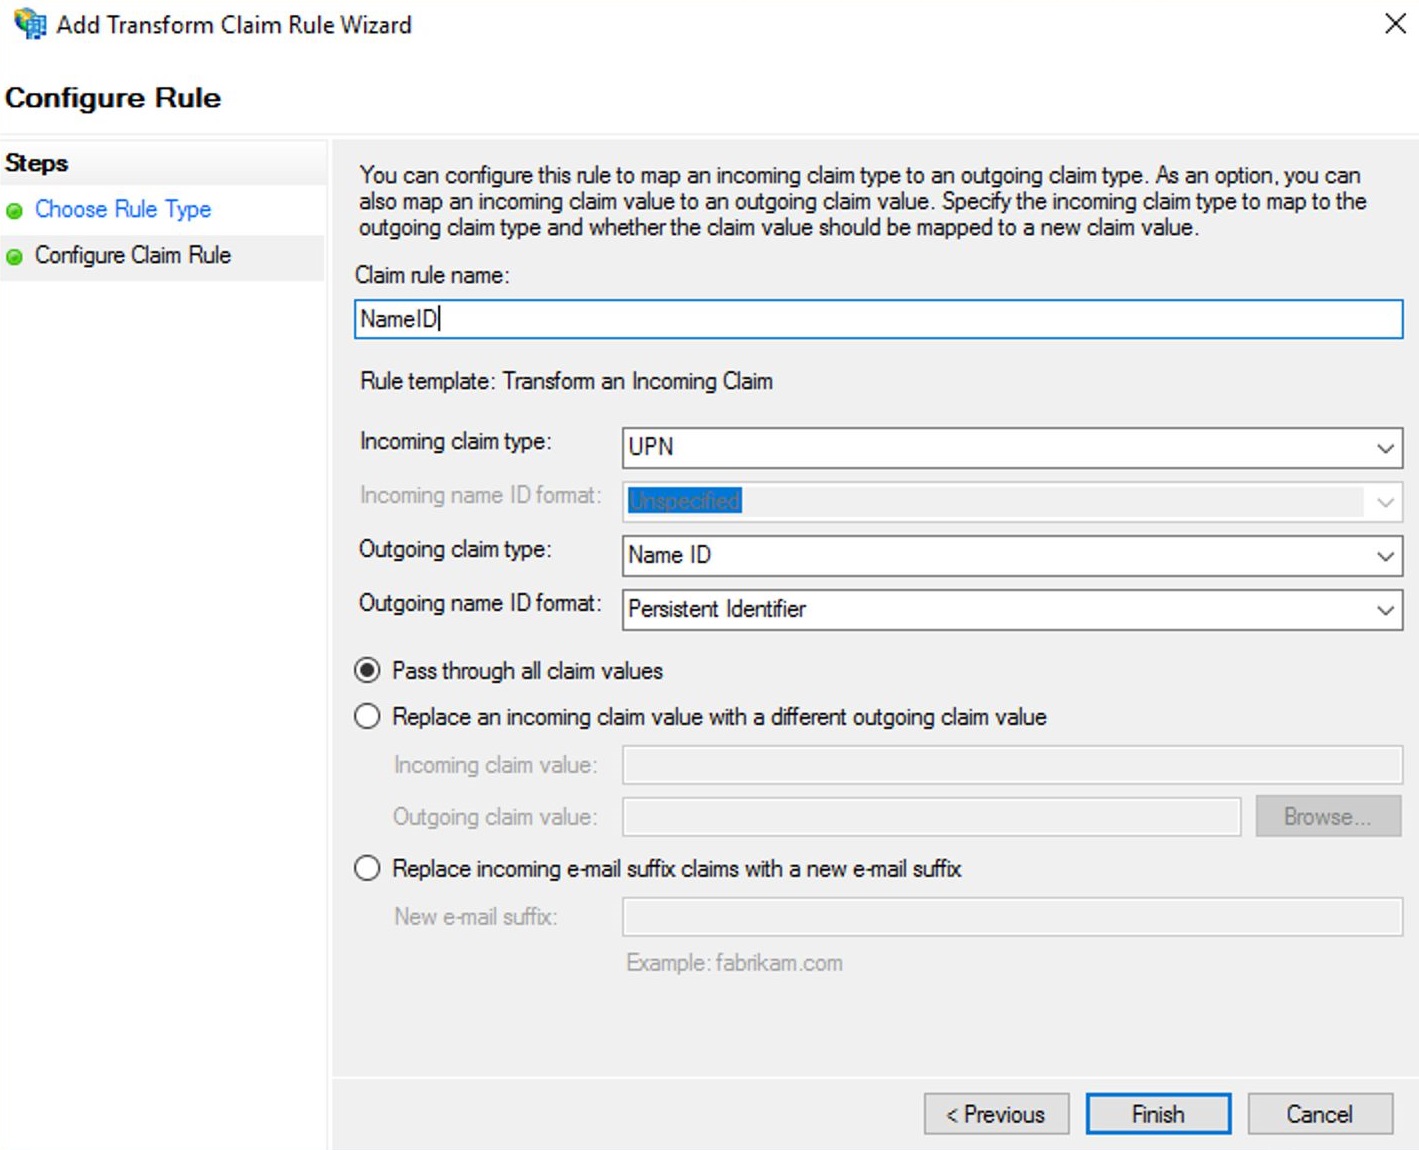
Enter a name for the rule, for example “NameID” and select Name ID under Outgoing Claim Type. Click Finish.
Note. The NameID value is used to identify the user in Yandex ID and cannot be changed. If you change your UPN, set one of the immutable user attributes as NameID in Active Directory, for example objectSID or objectGUID.
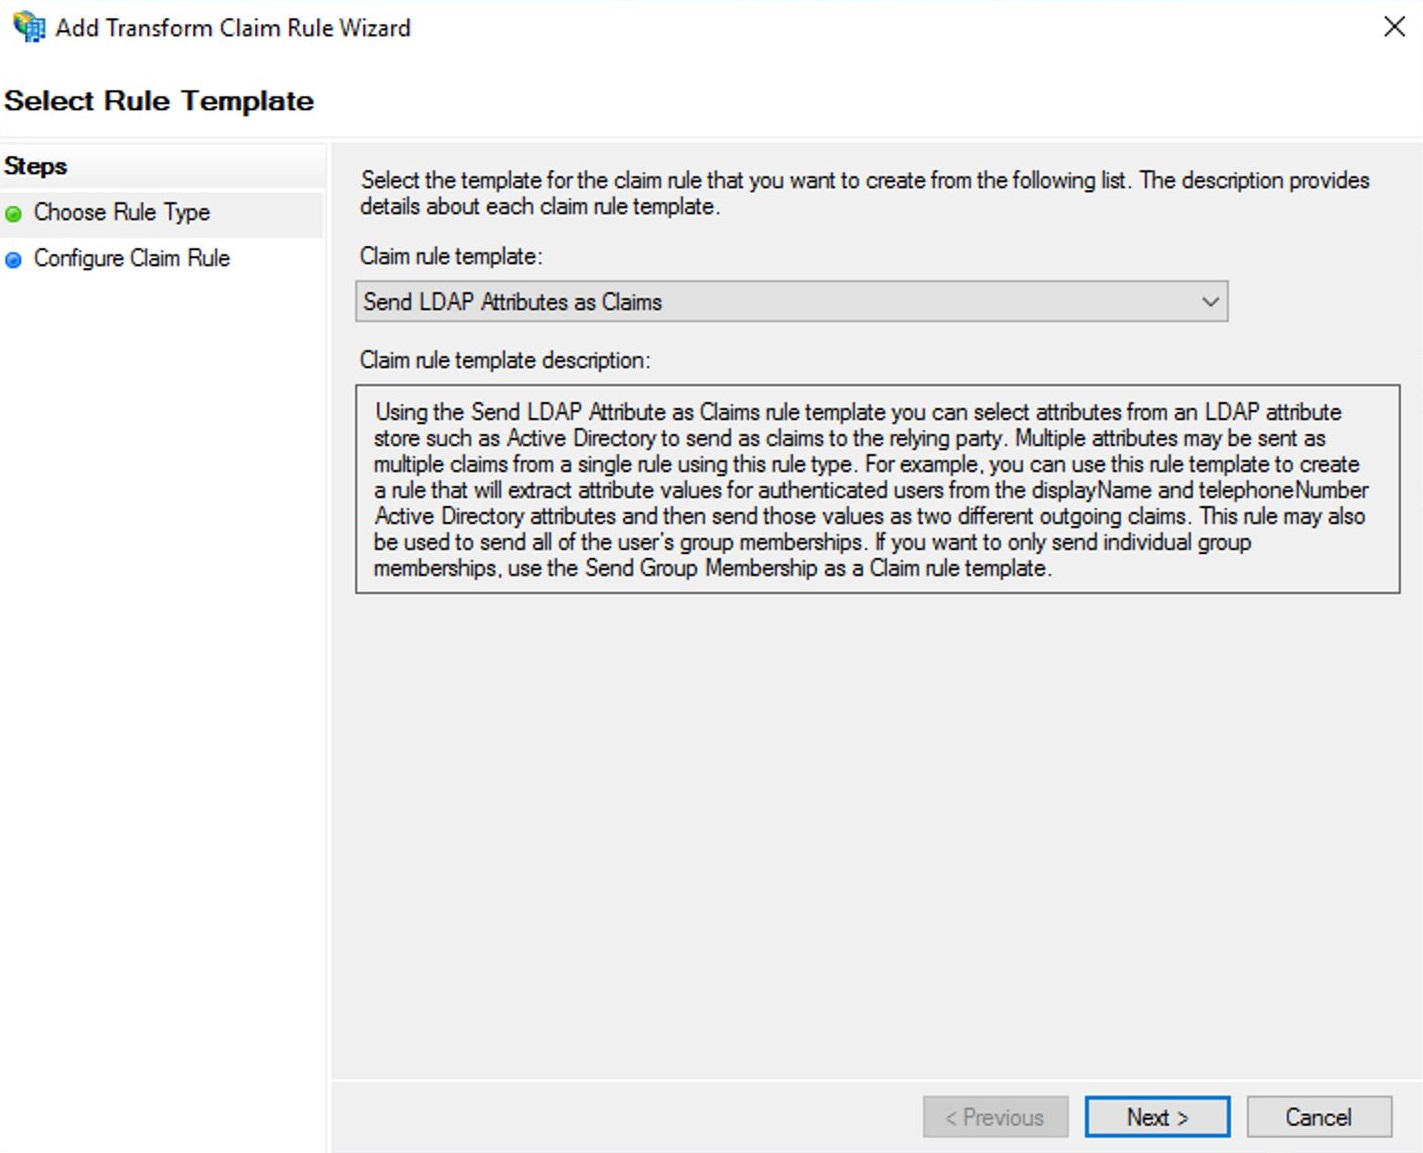
Create another rule by clicking Add Rule again. Select the Send LDAP Attributes as Claims template and click Next.
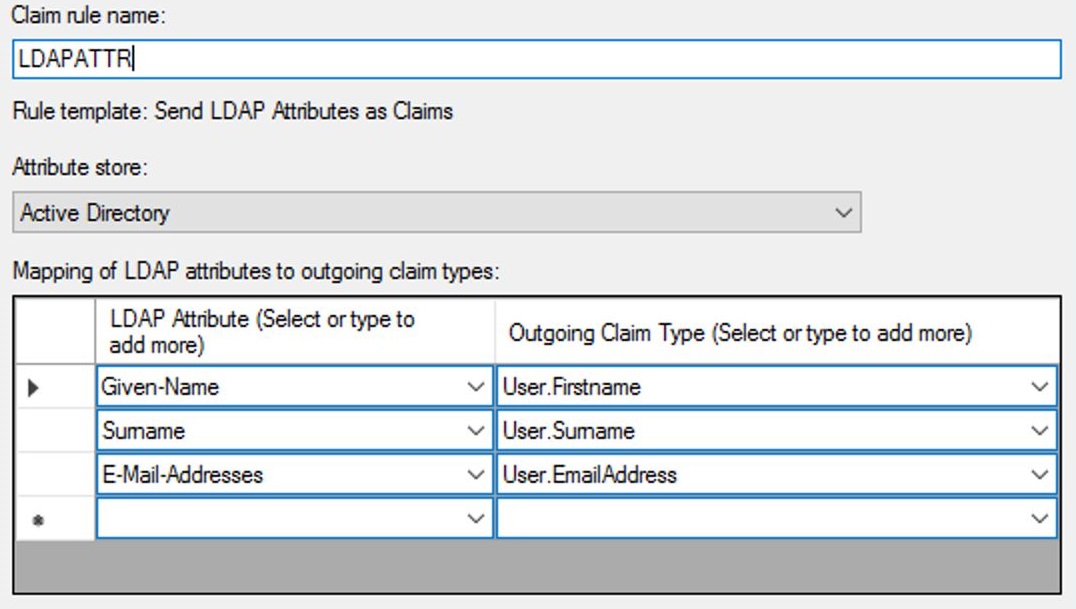
Enter a name for the rule, for example “LDAPATTR”, and fill out the fields as follows:Then click Finish.
Step 4. Collect the data to be sent to Yandex 360
Login page URL
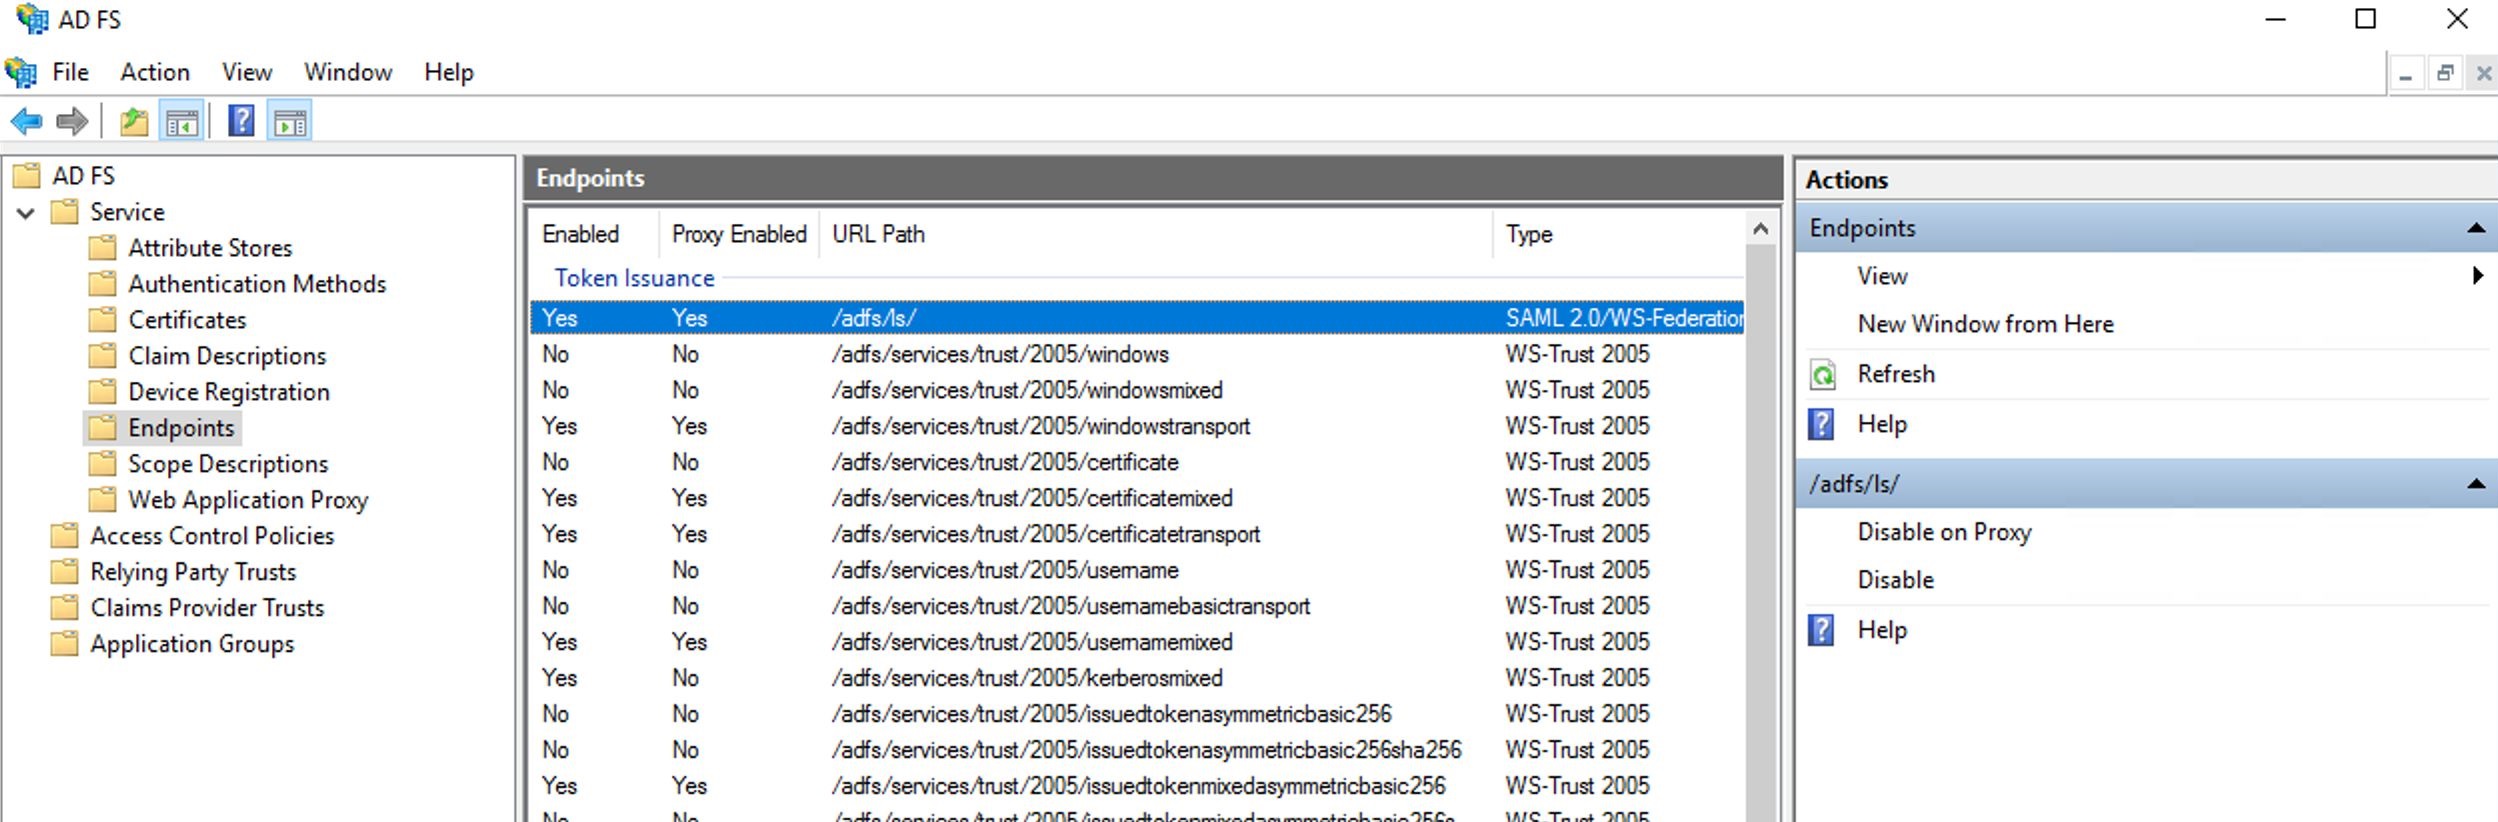
Entry point address. Usually, it is https://domain/adfs/ls.
In the management console, open Endpoints and make sure that the value of the Proxy Enabled parameter is set to Yes for /adfs/ls/.
Identity provider publisher
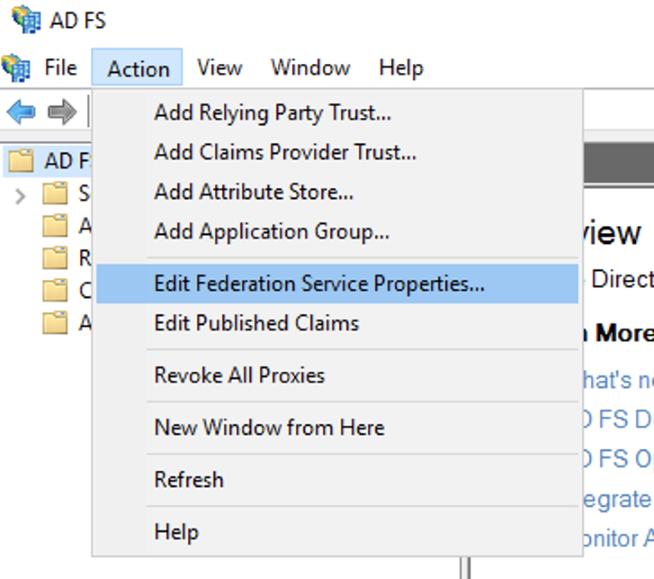
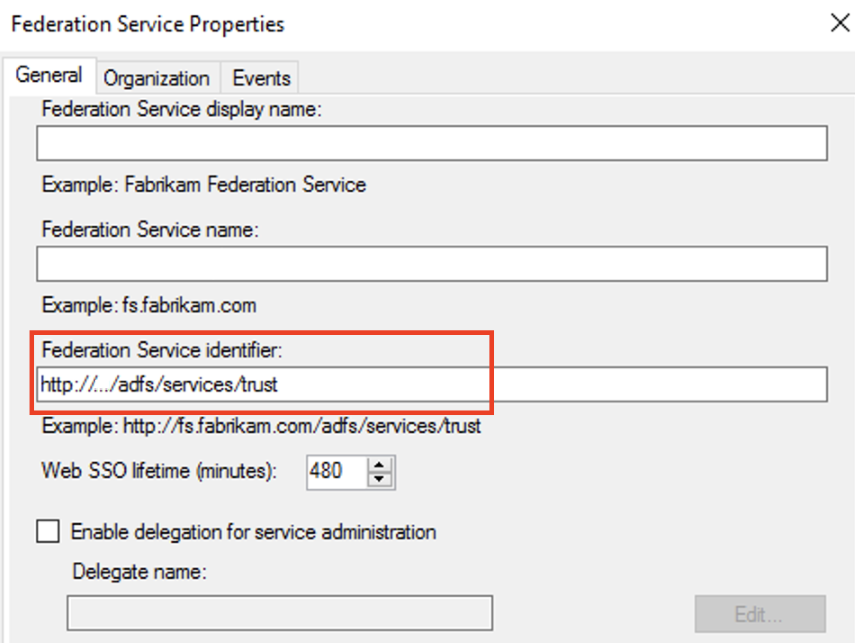
Domain entity ID. Usually, it is http://domain/adfs/services/trust.
To get it, go to the Action tab in the management console and select Edit Federation Service Properties.
The identifier is specified in the Federation Service identifier field.
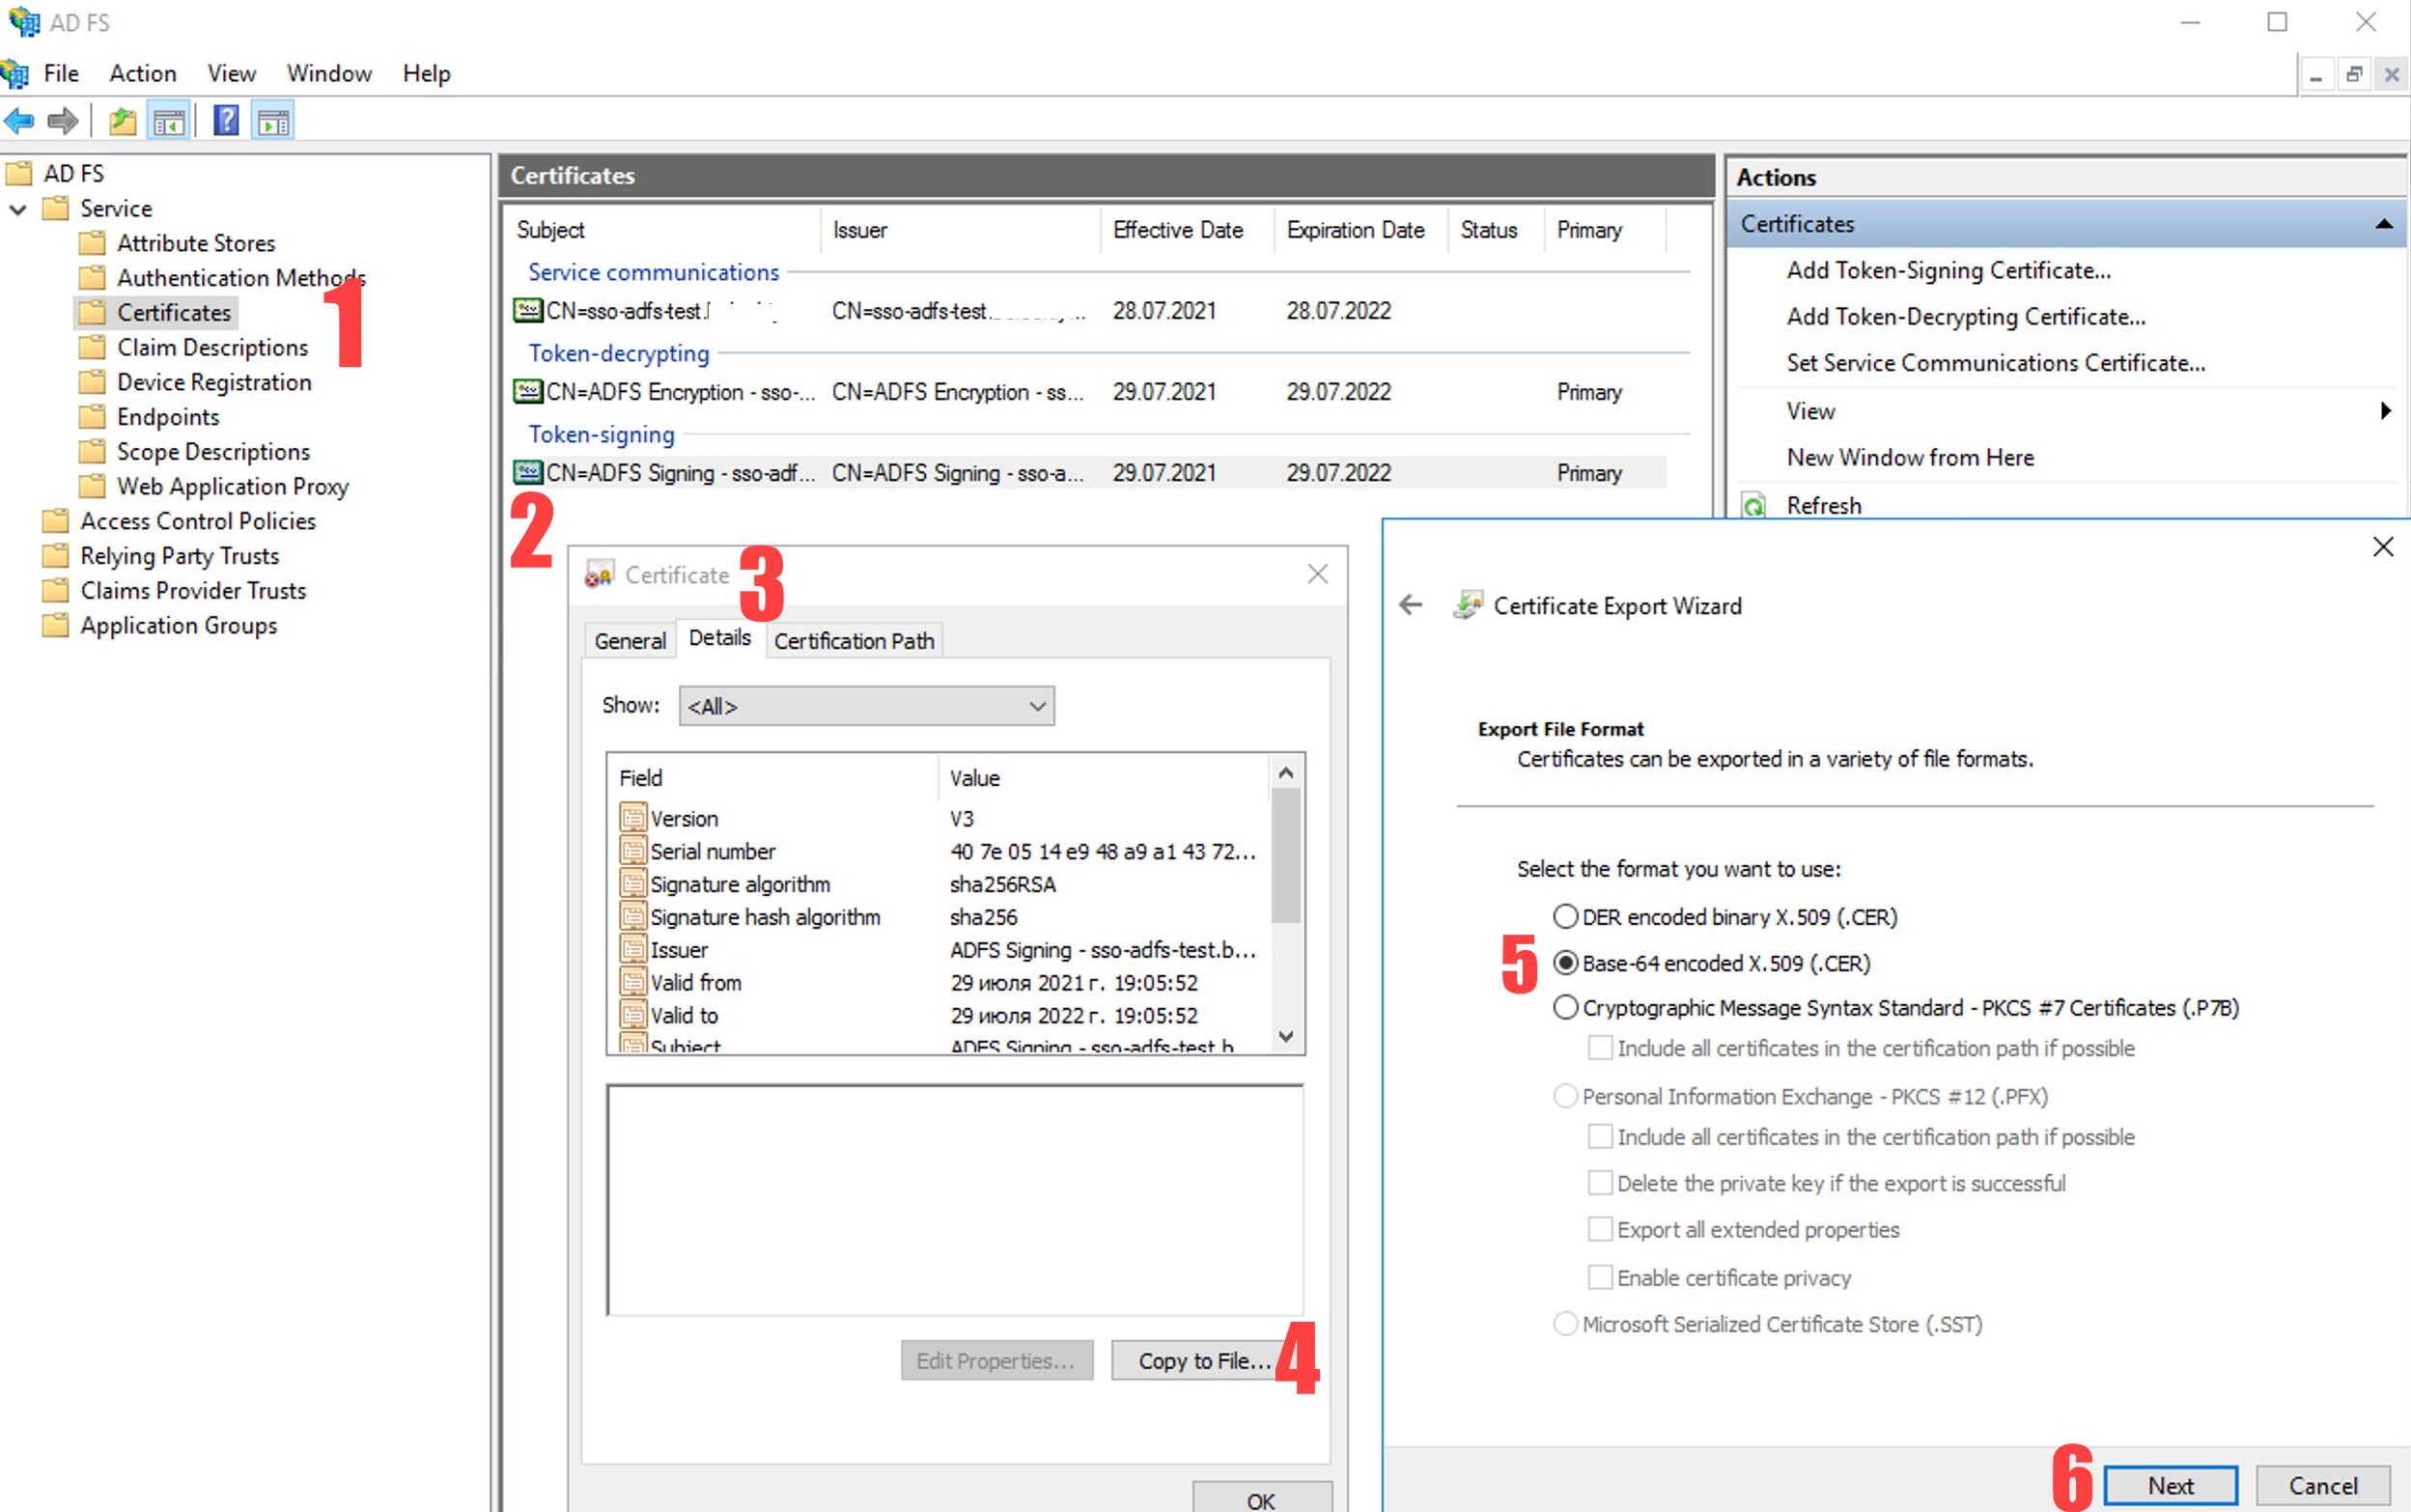
Verification certificate
Base64-encoded X.509 token-signing certificate. To get it:
In the management console, open Certificates.
Click twice on your Token-signing certificate.
Go to the Details tab and click Copy to File.
Select the Base-64 encoded X.509 (.CER) certificate type and click Next.
Save the file to your hard drive.
If you have two active token-signing certificates and you are not sure which certificate is currently being used, repeat the same actions for the second certificate.
Step 5. Set up synchronization of SCIM employees
By default, new employees appear in Yandex 360 after they log in to the service for the first time, and former employees can only be deleted manually. If you want to automatically sync the list of employees from AD FS with Yandex 360 for Business, enable SCIM synchronization.
Troubleshooting
If you enter invalid attribute values, when trying to log in via SSO you will see the "Login failed" message and one of the following error codes:
email.no_in_response
Specify the attribute names in the format User.Firstname, User.Surname, User.EmailAddress. If you use a different format, such as Firstname, you will not be able to log in.
Make sure that the domain in the User.EmailAddress mail attribute in the SAML response is the same as your primary domain or one of the alias domains. If they don't match, you will get an error message.

 Note. The NameID value is used to identify the user in Yandex ID and cannot be changed. If you change your UPN, set one of the immutable user attributes as NameID in Active Directory, for example