Prepare a secret in Google Workspace
A secret file is a file with an access key. Yandex 360 for Business uses it to connect to Google Workspace. To prepare it, you need to create a service account in Google Workspace, then create a new secret and save it to a file.
- Step 1. Create a project, account, and key
- Step 2. Set up access rights
- Step 3. Enable API access to the project
Step 1. Create a project, account, and key
- If you don't have a project, create one:
- Go to Google Service Accounts.
- Click Create project.
- In the Project name field, enter the name of the project.
- In the Organization field, select the company you want to transfer data from.
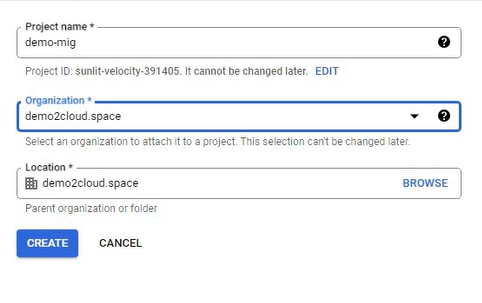
- Click Create. Wait until the page with the new project is loaded.
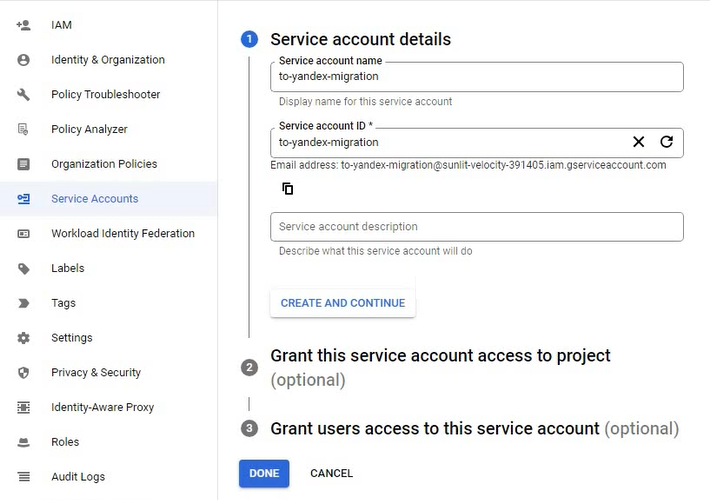
- On the top panel, click Create service account.
- In the Service account name field, enter the name of the account.
- Click Create and continue.
Optional steps:
Grant this account access to the projectSkip the Grant this service account access to project step or set up project access rights.Grant users access to the projectSkip the Grant users access to project step or specify the users who can manage your account. - Click Done. The new service account will appear in the list.
- Open the account, copy Unique ID, and save it in a text file. You'll need it in the next step.
Example of an identification number:
104585045394161743643 - Go to the Keys tab.
- Select .
- In the Key type block, select JSON.
- Click Create to download the key to your computer.
Step 2. Set up access rights
- Open Google Admin Console .
- Select .
- Click Manage domain wide delegation.
- In the API clients block, click Add.
- In the Client ID field, specify the account identification number that you copied and saved at Stage 6 of Step 1.
Copy the following line:
https://www.googleapis.com/auth/drive,https://www.googleapis.com/auth/admin.directory.user.readonly,https://mail.google.com/,email,profile- Paste it into the OAuth scopes (comma-delimited) field.
- Click Authorize.
Step 3. Enable API access to the project
- In the Select a project drop-down list on the Admin SDK API page, select your project and click Enable.
- In the Select a project drop-down list on the Google Drive API page, select your project and click Enable.
Once you set up the project, you can start migrating emails and files. To start migration, you will need the secret file that you downloaded at Stage 10 of Step 1.
